I promise this blog will be more about tech and geek stuff rather than all automotive stuff, but it seems I have had a streak of bad luck with my Expy lately... Driving it on my rather long commute to work, I have been experiencing a massively irritating shudder.
Shudder, that is an interesting work. I actually felt at times the vibration was going to rattle my teeth out! I pulled the Expedition into the Geek's Garage to have a look. I crawled underneath, jacked it up, poked and prodded, but found nothing that really could be the cause.
So to the interweb I went! I went over to the Ford Trucks forum and did some searching. It seems this is a common problem with the Expedition. The fine boys over there explained to be that my Expedition has what is called a limited slip differential. There are clutches in there that keep the gears engaged and do other things that I don't understand. I guess when they get tired of the gear oil in that is in there, they start to "shudder"...And I though my truck was just allergic to my workplace. I guess I will keep my job.
OK, so, the mighty interweb says to change out the gear oil in the differential with 75/140 gear oil and add some friction modifier to it. Actually it says to add the friction modifier and then add the gear oil, but more on that later. The friction modifier (also called limited slip additive) comes in a toothpaste like tube near the gear oil.
As a warning, this is one messy and nasty job, I suggest you have lots of towels hand that you can throw away after you are done. Also, put some cardboard down to protect your floor, and by all means wear gloves. Gear oil is some of the nasty stuff and smells a bit the dead monkeys. Last time I checked, women were not impressed by dead monkey smell, so try your best to keep this stuff off of you and every thing else!
First you need to remove your old nasty gear oil from your diff. There are a couple of ways to do this. You can remove the back cover by taking off all of the bolts and then having to reseal it or you get yourself a suction pump and remove it from the fill hole. Since I wanted to do this as quickly as possible without the risk of leaks, I chose the suction pump route. Here is a picture of my hand powered suction pump.
It is a pretty basic tool. Stick the hose end in the fluid and pull back on the handle.
Next you will have to locate the fill plug on the differential. This is a small plug that has a square hole in it that your socket wrench will fit into. You need to be a little careful when removing so you don't break it or strip it, but my came off easily. Just in case, spray it with some lubricant, such as PB Blaster, the day before you try to take it off. That always helps speed it up. Here is a shot of my diff fill plug...
OK, there are no more pictures from here on out because as I said, this is a really messy job. I am a geek at heart, so my camera will not get near this dead monkey smelling stuff!
So next, remove your fill plug. Feed your hose end of your fluid suction pump into your diff. You will probably have to bend it and coax it in past the gears, but it will eventually go in. Once you get the hose in to near the bottom of the diff, slowly pull back on the handle of the fluid suction pump. It will fill up with gear oil. I had my oil pan nearby and dispensed with the old oil from the pump to the oil pan. This took several times until I could not get any more gear oil out. Now the diff is mostly empty.
Next I added my Limited Slip additive to the diff. It is hard to maneuver under there, but you will get it. Remember, be careful not to get this on you. It is nasty stuff. Your date will thank you later...
OK, now that you have put in the additive, it is time to put in the gear oil. Again, it is hard to maneuver under here, so take your time, you will get it. First I tried adding hoses to the end of the gear bottle, but I found it was easier and faster if I maneuvered the bottle into place and then placed my gloved finger over the end till I got to the fill hole and then released my finger and squeezed the oil in.
That is it. Don't forget to replace your fill plug and clean up the dead monkey smell off of everything. Take your Expy out for drive and make some turns or find a spot to do some figure eights to get your gear oil mixed good.
So far the shudder is gone. I will come back and update after a couple of weeks to see if that is still the case.
Remember, save money and stay geeky!
You are right: you don’t have to comment or share, but do it anyway; I love hearing from you!
Post Sponsor:
Shudder, that is an interesting work. I actually felt at times the vibration was going to rattle my teeth out! I pulled the Expedition into the Geek's Garage to have a look. I crawled underneath, jacked it up, poked and prodded, but found nothing that really could be the cause.
So to the interweb I went! I went over to the Ford Trucks forum and did some searching. It seems this is a common problem with the Expedition. The fine boys over there explained to be that my Expedition has what is called a limited slip differential. There are clutches in there that keep the gears engaged and do other things that I don't understand. I guess when they get tired of the gear oil in that is in there, they start to "shudder"...And I though my truck was just allergic to my workplace. I guess I will keep my job.
OK, so, the mighty interweb says to change out the gear oil in the differential with 75/140 gear oil and add some friction modifier to it. Actually it says to add the friction modifier and then add the gear oil, but more on that later. The friction modifier (also called limited slip additive) comes in a toothpaste like tube near the gear oil.
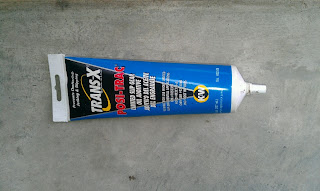 |
| Limited Slip Additive |
As a warning, this is one messy and nasty job, I suggest you have lots of towels hand that you can throw away after you are done. Also, put some cardboard down to protect your floor, and by all means wear gloves. Gear oil is some of the nasty stuff and smells a bit the dead monkeys. Last time I checked, women were not impressed by dead monkey smell, so try your best to keep this stuff off of you and every thing else!
 |
| Gear Oil |
First you need to remove your old nasty gear oil from your diff. There are a couple of ways to do this. You can remove the back cover by taking off all of the bolts and then having to reseal it or you get yourself a suction pump and remove it from the fill hole. Since I wanted to do this as quickly as possible without the risk of leaks, I chose the suction pump route. Here is a picture of my hand powered suction pump.
 |
| Fluid Suction Pump |
It is a pretty basic tool. Stick the hose end in the fluid and pull back on the handle.
Next you will have to locate the fill plug on the differential. This is a small plug that has a square hole in it that your socket wrench will fit into. You need to be a little careful when removing so you don't break it or strip it, but my came off easily. Just in case, spray it with some lubricant, such as PB Blaster, the day before you try to take it off. That always helps speed it up. Here is a shot of my diff fill plug...
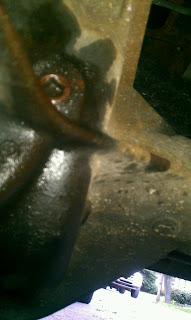 |
| Differential Plug Location |
OK, there are no more pictures from here on out because as I said, this is a really messy job. I am a geek at heart, so my camera will not get near this dead monkey smelling stuff!
So next, remove your fill plug. Feed your hose end of your fluid suction pump into your diff. You will probably have to bend it and coax it in past the gears, but it will eventually go in. Once you get the hose in to near the bottom of the diff, slowly pull back on the handle of the fluid suction pump. It will fill up with gear oil. I had my oil pan nearby and dispensed with the old oil from the pump to the oil pan. This took several times until I could not get any more gear oil out. Now the diff is mostly empty.
Next I added my Limited Slip additive to the diff. It is hard to maneuver under there, but you will get it. Remember, be careful not to get this on you. It is nasty stuff. Your date will thank you later...
OK, now that you have put in the additive, it is time to put in the gear oil. Again, it is hard to maneuver under here, so take your time, you will get it. First I tried adding hoses to the end of the gear bottle, but I found it was easier and faster if I maneuvered the bottle into place and then placed my gloved finger over the end till I got to the fill hole and then released my finger and squeezed the oil in.
That is it. Don't forget to replace your fill plug and clean up the dead monkey smell off of everything. Take your Expy out for drive and make some turns or find a spot to do some figure eights to get your gear oil mixed good.
So far the shudder is gone. I will come back and update after a couple of weeks to see if that is still the case.
Remember, save money and stay geeky!
You are right: you don’t have to comment or share, but do it anyway; I love hearing from you!
Post Sponsor:


